Editing a small piece of code, or change in configuration file is perhaps the most common thing for a developer to do while testing the site, or even when the site is live for production traffic. When you host in with some hosting providers, most often you end up re-deploying the whole package, or transfer that file over FTP, or any other deployment methods. In this blog, I’m going to cover a few other methods which will help you edit your files of your website hosted in Windows Azure Web Sites.
[Monaco] Visual Studio Online
If you have a very quick edit of a source code, or configuration, editing it over this new shiny Visual Studio Online link for WAWS is perhaps the easiest of all. I have already written about this feature some time back in this blog. Here are the quick steps:
- Enable ‘Edit in Visual Studio Online’ option for the website. You can find this option in the Portal –> Websites –> Your Website –> Configure tab. Set it to ON. Click on Save.
- Click on the ‘Edit in Visual Studio Online’ option in the Dashboard. Once you did the step 1 to enable this option, and saved it successfully, you should see a new option listed in the Dashboard, ‘Edit in Visual Studio Online’. Click on it.
- Enter your deployment user credentials when asked.
- Choose the file you want to edit, and start editing your site live. No save button. It’s live as you edit.
Here is a screenshot of my test config file with Monaco:

Kudu Console of your website
If you have your site in WAWS, you should definitely check out this Kudu console for the site. Along with some cool stuffs like an interactive console, this also offers you a way to edit the files. Here are the quick steps to edit your web.config file using Kudu console:
- Browse to https://<yoursite>.scm.azurewebsites.net, and enter your Deployment credentials to access the Kudu console.
- You are greeted with a lot of options, for our task, choose the “Debug console” from the top menu.
- Now you are presented with a somewhat familiar screen showing a command prompt window, and a file explorer in the top.
- Select the folder. In our case, web.config would be inside /site/wwwroot
- You would see something like below:

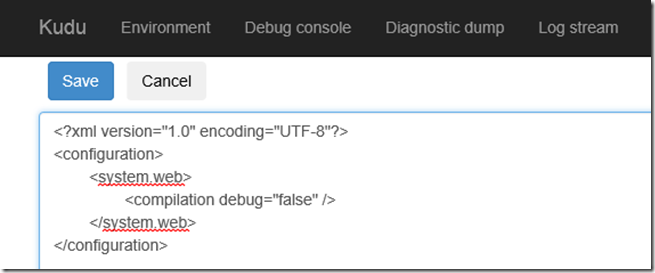
- Click on the
 ‘Edit’ icon in the web.config file. Now, you will see something like below, where you can edit the content of the file, and hit ‘Save’ button.

Hope this helps!