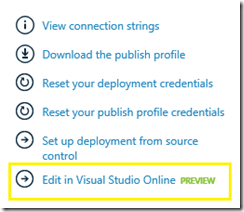
Yeah, this is one feature everyone wanted for a long time. An online editing option, with all (okay, almost) the goodness of Visual Studio. Here is my step by step guide to do the same. I’m assuming you have already created a Windows Azure Web Sites. If you haven’t, you can read about that here.
Step 1 : Enable ‘Edit in Visual Studio Online’ option for the website.
You can find this option in the Portal –> Websites –> Your Website –> Configure tab. Set it to ON. Click on Save.

Wait until you see the setting saved. You should see the below message:

Step 2 : Click on the ‘Edit in Visual Studio Online’ option in the Dashboard.
Once you did the step 1 to enable this option, and saved it successfully, you should see a new option listed in the Dashboard, ‘Edit in Visual Studio Online’. Click on it.

Step 3 : Enter your deployment user credentials when asked.
This is the user account that you use to login to your FTP folder. If you aren’t sure, you can look at the username in the Dashboard page. If you have forgotten the password, you can select the ‘Reset your deployment credentials’ option from the Dashboard, and use the new credentials.
Step 4 : Edit your site live. No save button. It’s live as you edit.

Note the html tags highlighting. This is just brilliant! If you want to quickly edit something in the site, say some config setting, you don’t need to redeploy the web.config using any of your favorite deployment methods, just a click away to edit the files.
Don’t miss to follow the Channel 9 series on Monaco.